Deploying NGINX web server and uploading a simple PHP web app on a VPC with Private EC2 Ubuntu servers Part-1

Devops || Cloud Engineer || AWS certified || GCP
This will be a multi-part series where we will set up a VPC (Virtual Private Cloud) on AWS (Amazon Web Services). We will be making use of the AWS free tier eligible services, so if you don’t have a new account, you can get one here
Setting up a VPC is an essential step in setting up a secure and reliable cloud infrastructure. It allows us to create isolated or private networks for our resources, set up security groups, and manage the availability of our resources across multiple Availability Zones.
In addition to setting up the VPC, it is essential to configure Route Tables, Security Groups, and Subnets for optimal performance. With these components in place, you can create an efficient and secure environment for your applications on AWS.
In part 1 we will set up our VPC, route table and instances
Setting up our VPC
We will log in to the AWS console and navigate our way into the VPC option.
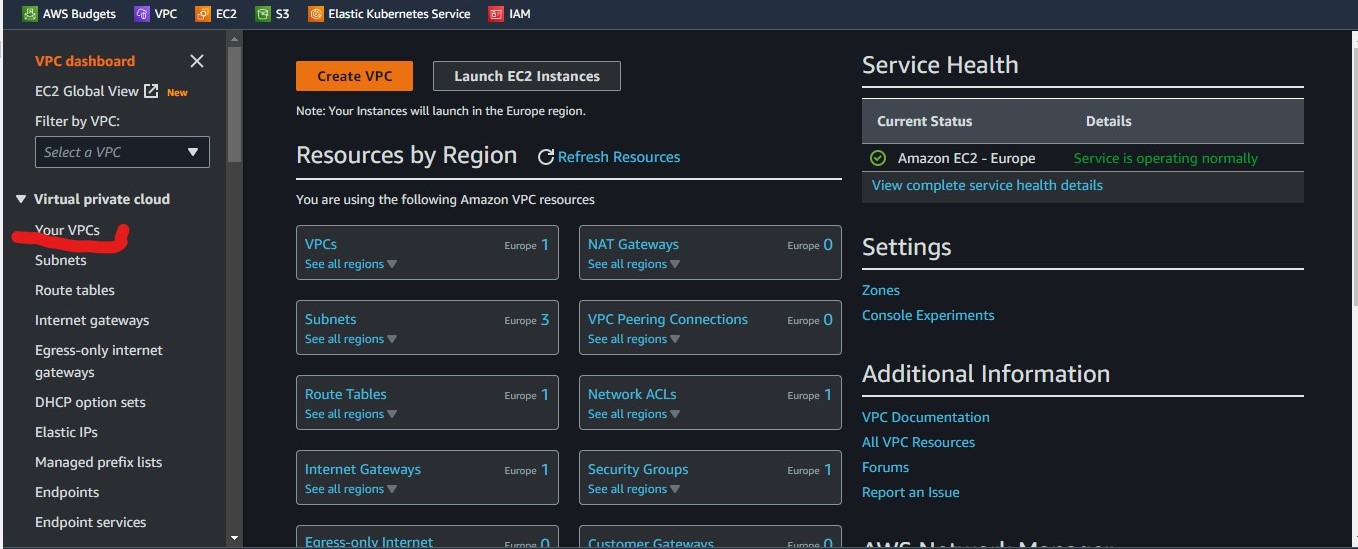
Once we get there we will click on Create VPC
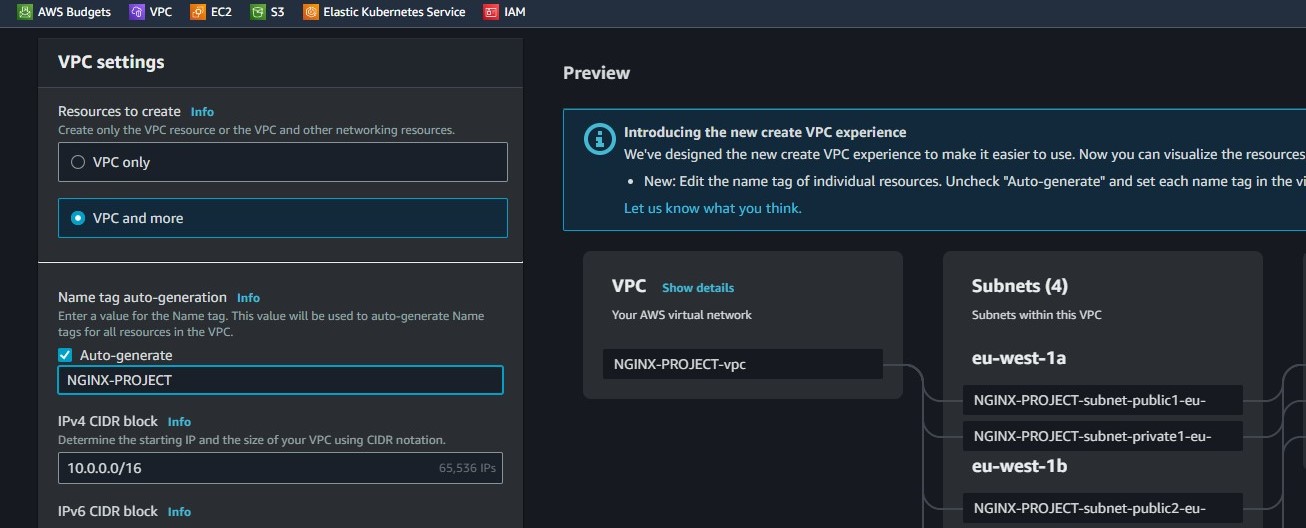
We will select the "VPC and more" option like in the image above and give our VPC any name we like. AWS will automatically allocate us the CIDR block 10.0.0.0/16
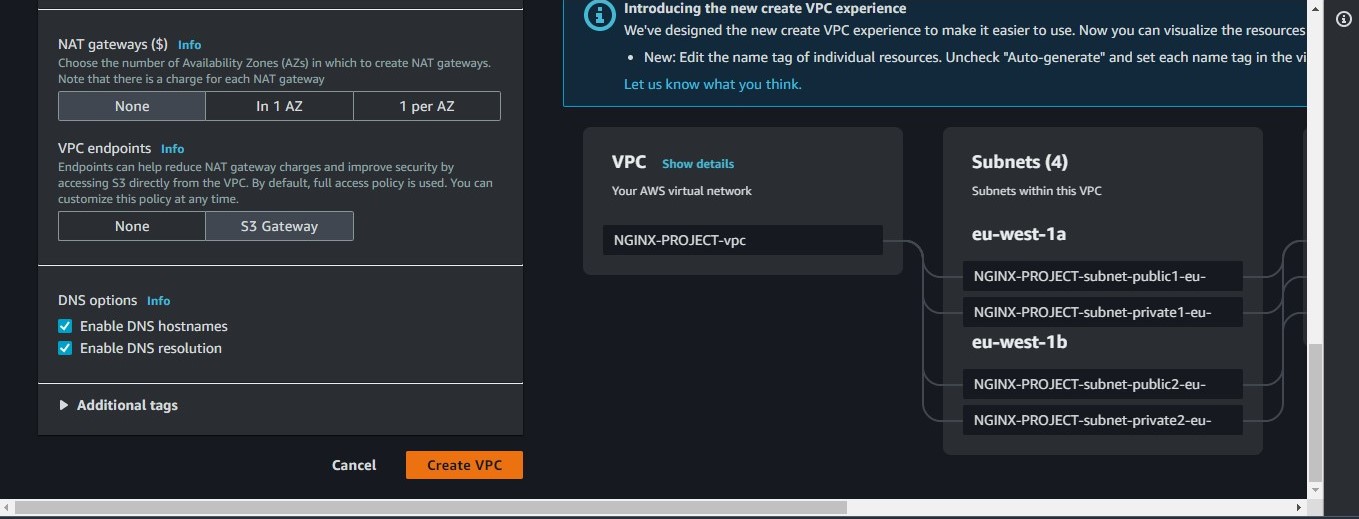
The next step is to leave all options as default except the "Nat Gateway" for which we will select none as shown in the images below. Then we click the Create VPC button
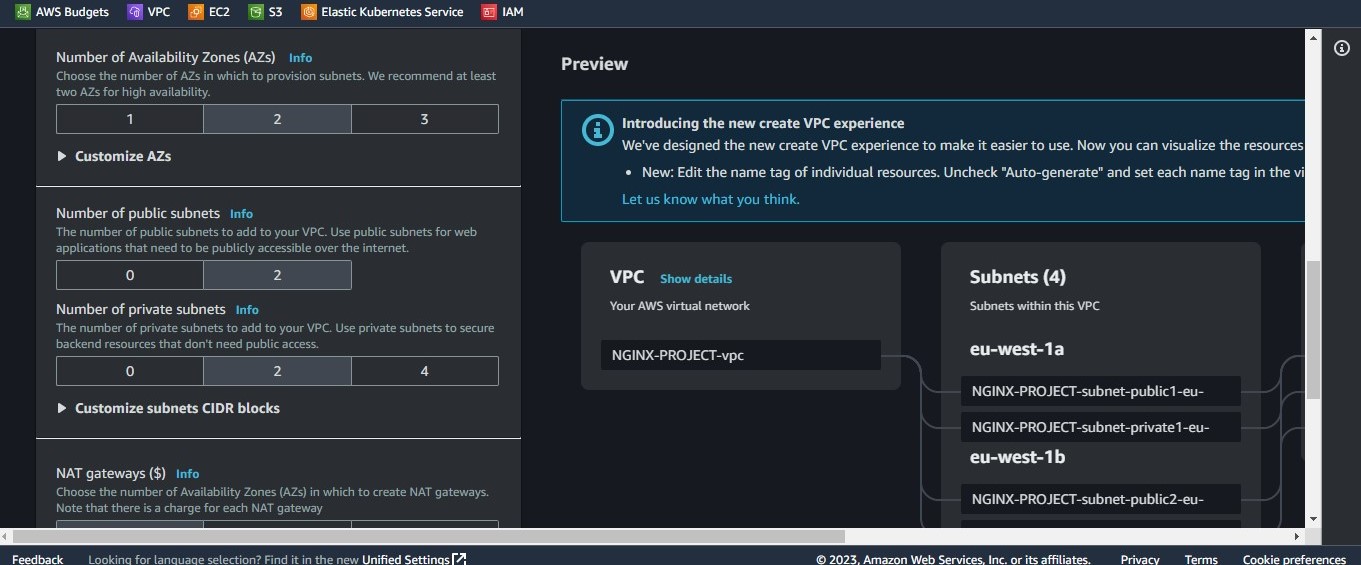
This will create a couple of components
2 Public and Private subnets.
1 Public Route table and 2 Private route tables.
1 Internet Gateway.
Associating our Private route table to our private subnet
Select a private route table and click on "subnet associations"
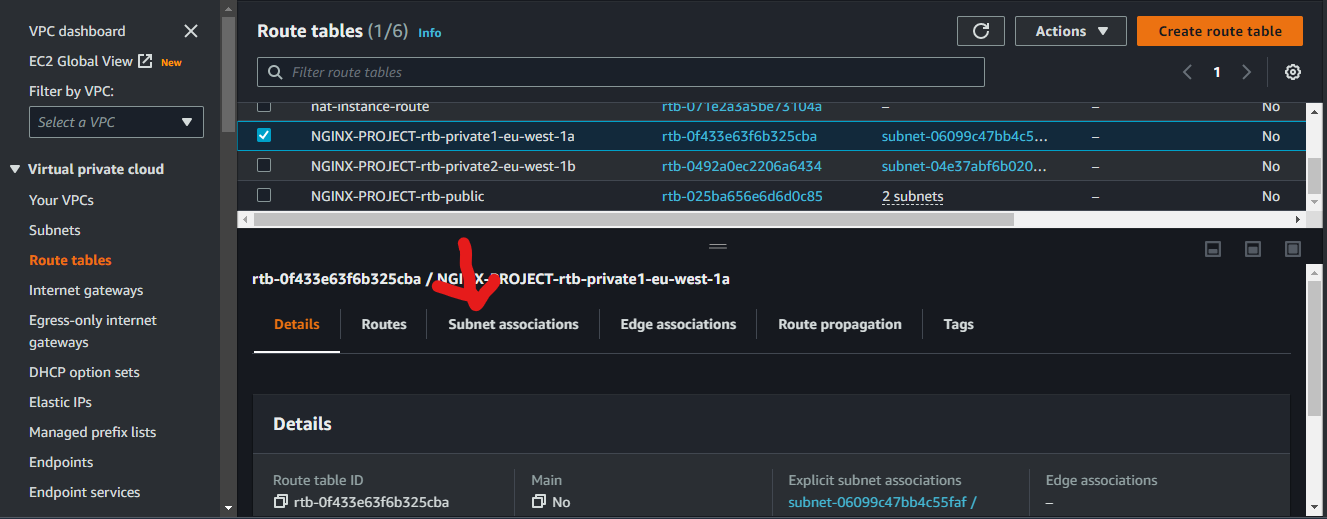
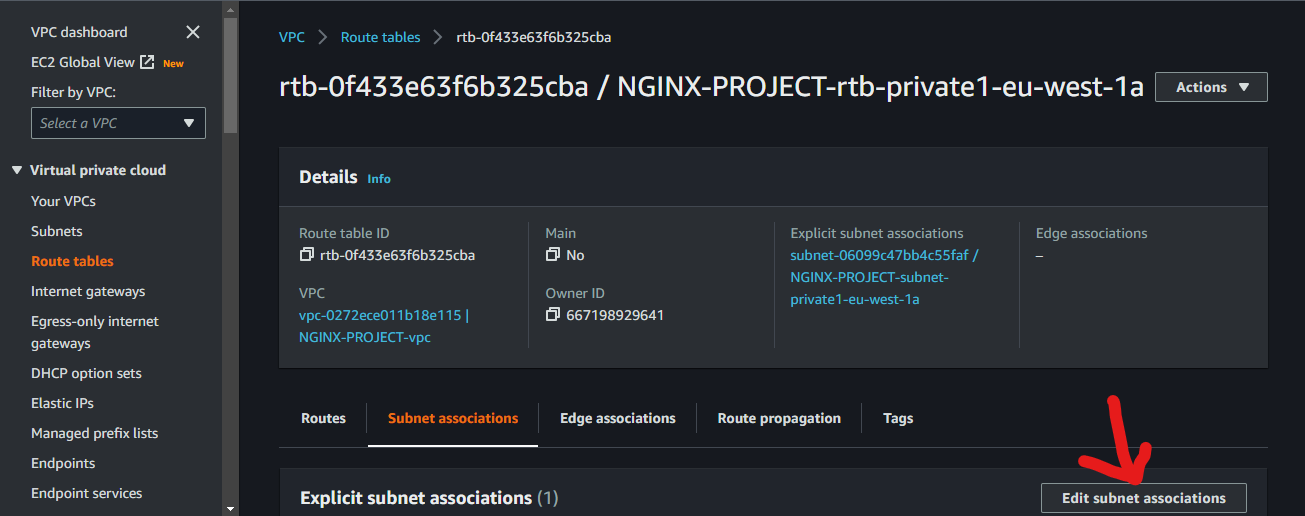
Click on "Edit subnet associations"
select the corresponding subnet
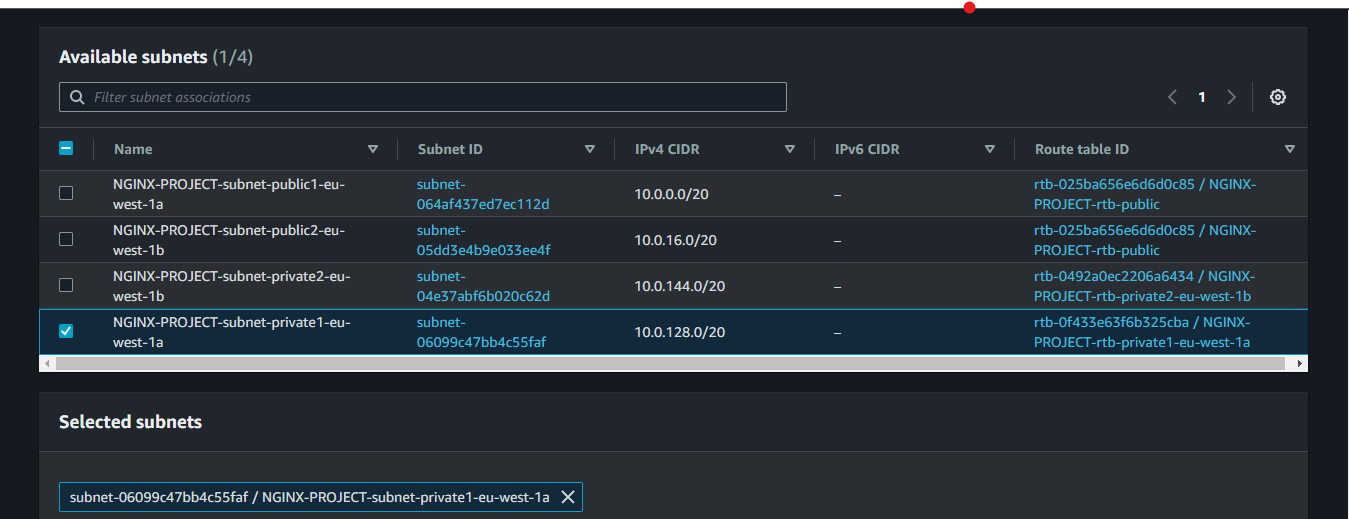
do the same for the second private route table to the second private subnet.
So we are now ready to create our EC2 instances.
Setting up our EC2 instances
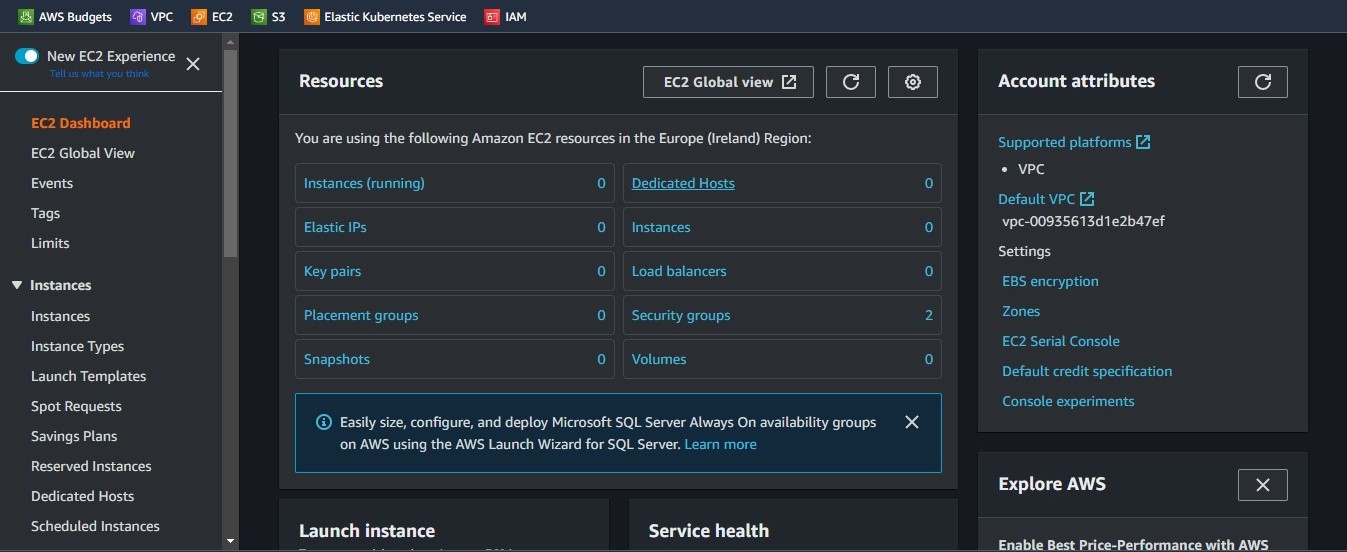
Like with our VPC, we will go to the search bar and type EC2 then navigate into the EC2 dashboard shown in the image above.
The instances we will be creating are:
The bastion instance
The two private instances
The nat-Instance
The Bastion instance
A bastion host is a server whose purpose is to provide access to a private network from an external network
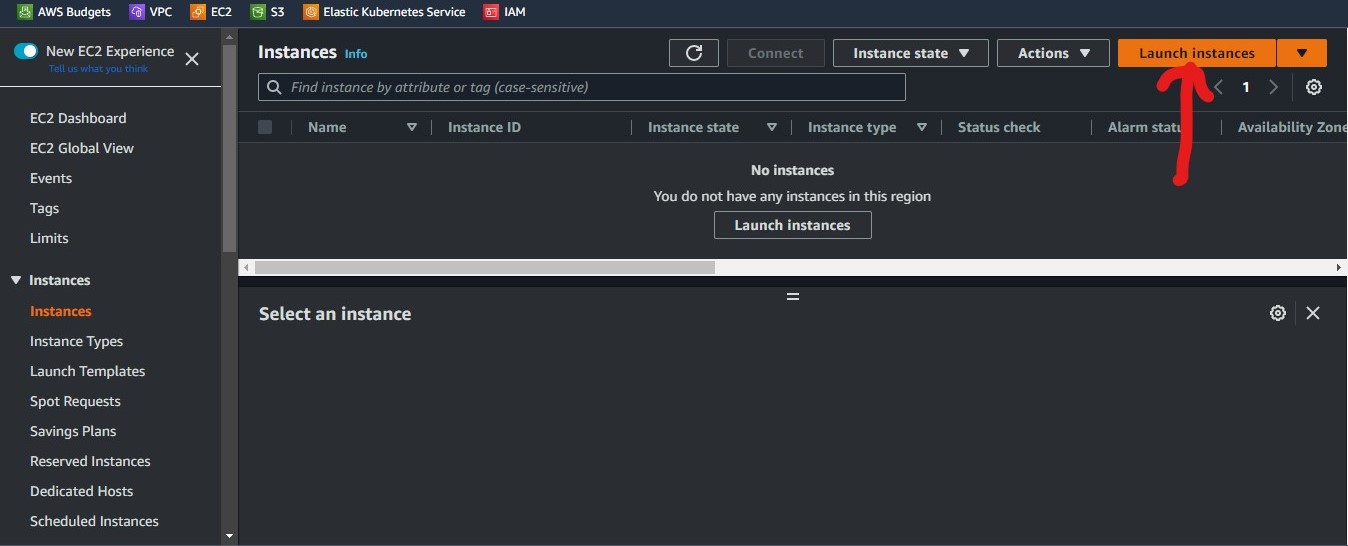
We will select the "instance" option on the left side menu, once in we click on the "launch instance" button
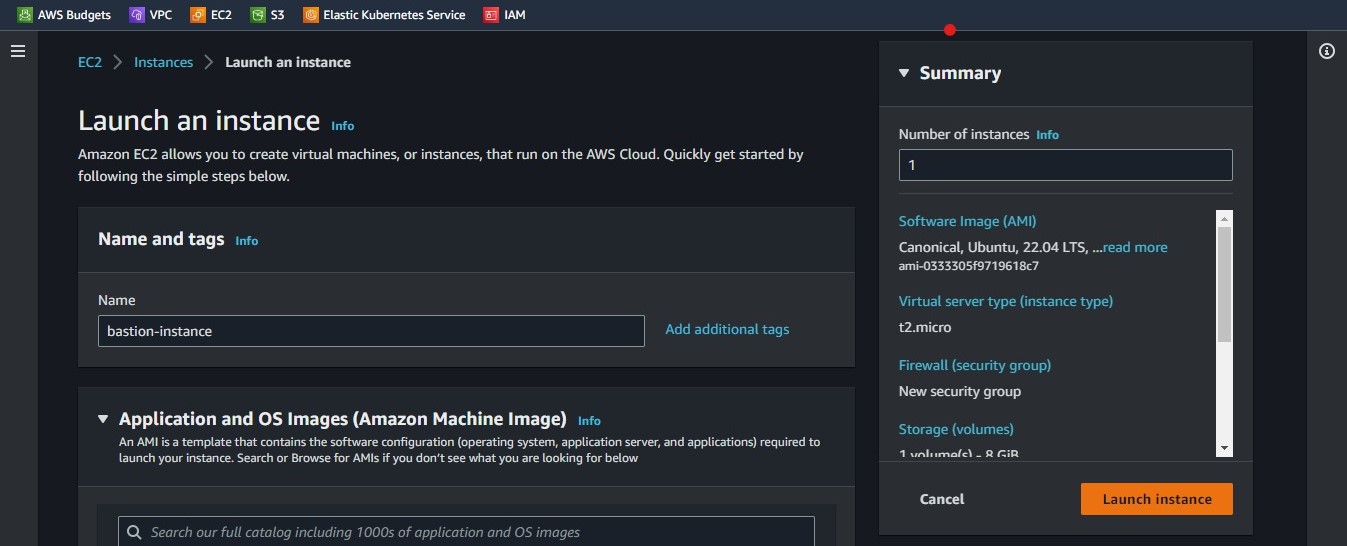
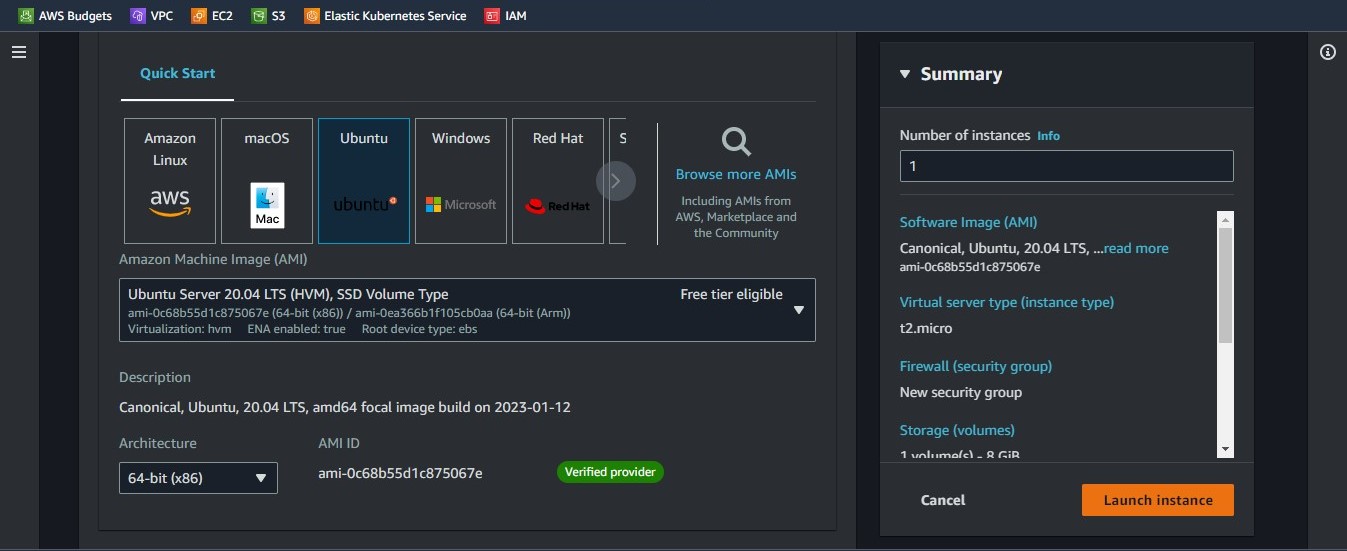
The next step is to give our instance a name and select the AMI or OS for our instance. We will be using "Ubuntu Server 20.04 LTS" which is free tier eligible**.** Follow the images below for guidance
We then select our instance type "t2.micro" and create a key pair to access our instances via SSH.
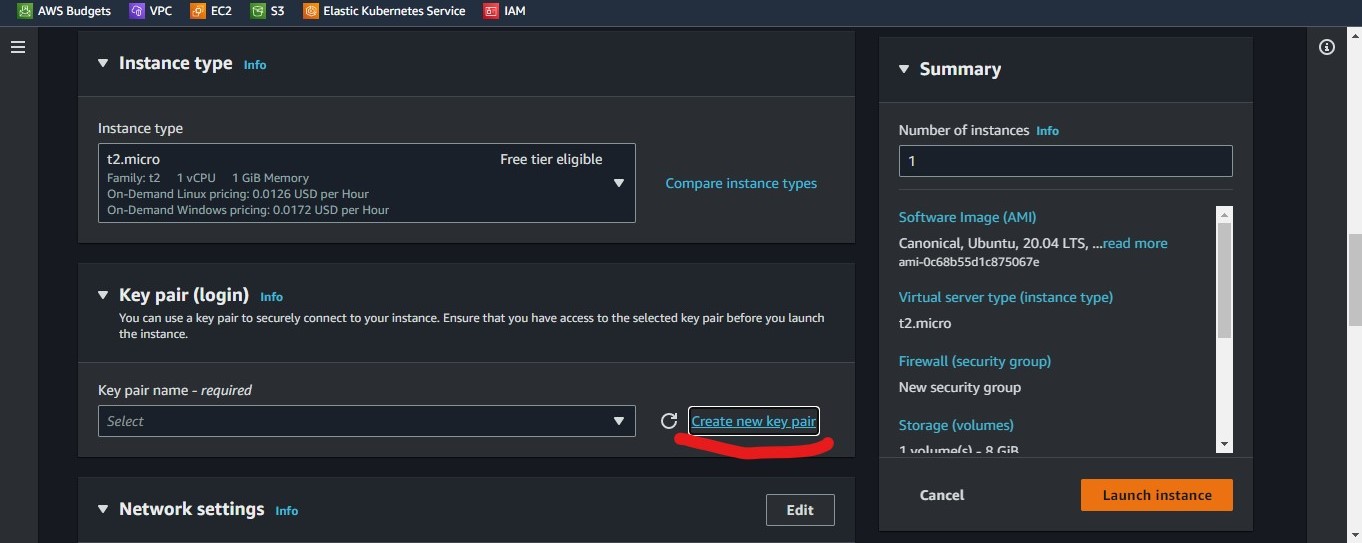
Click on the "Create new Key Pair" option
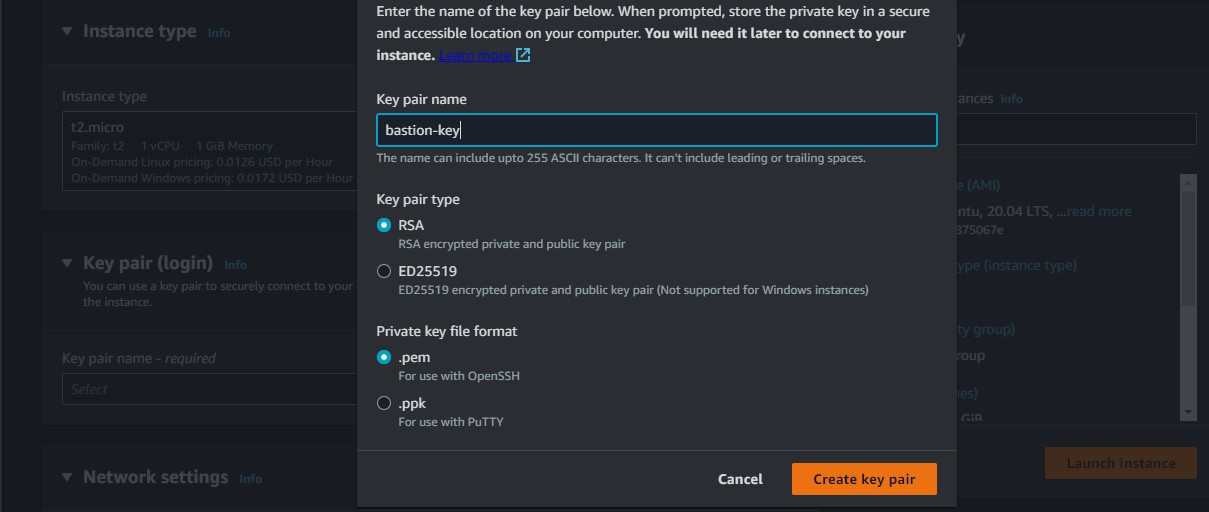
We select the "RSA" and ".pem" and then click the create key pair button which downloads our key on our machine.
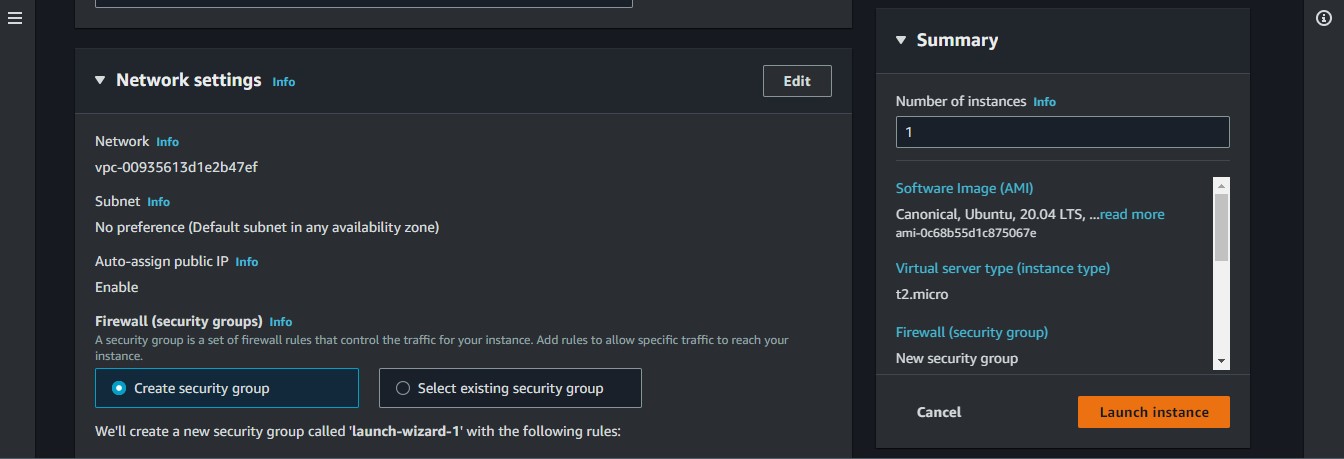
Click the "Edit" button in the network section
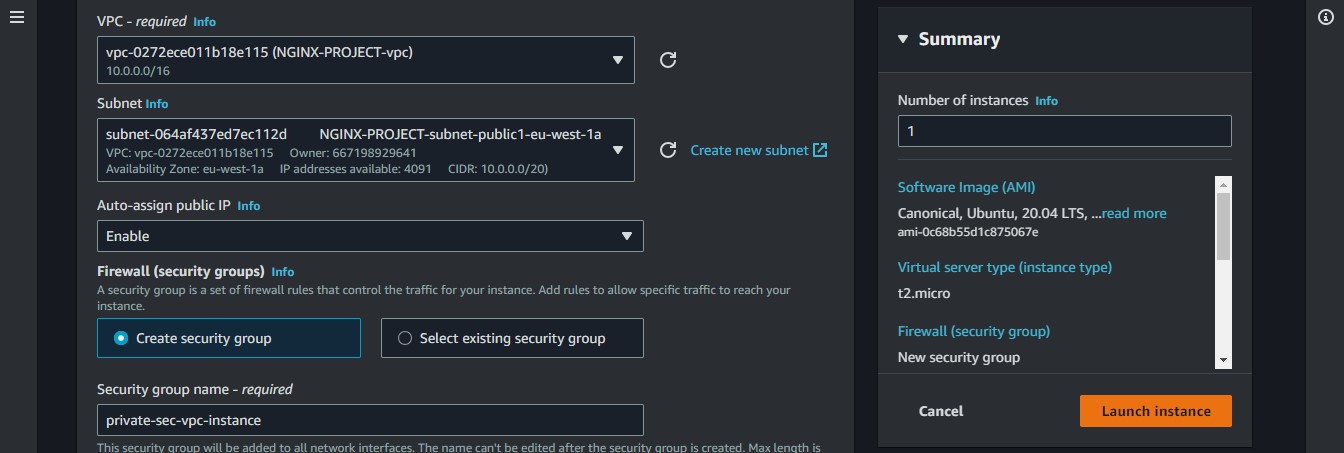
Select the VPC we created and a public subnet. Enable Public IP, then let us select the "create a security group" option. we can give this SG a recognisable name.
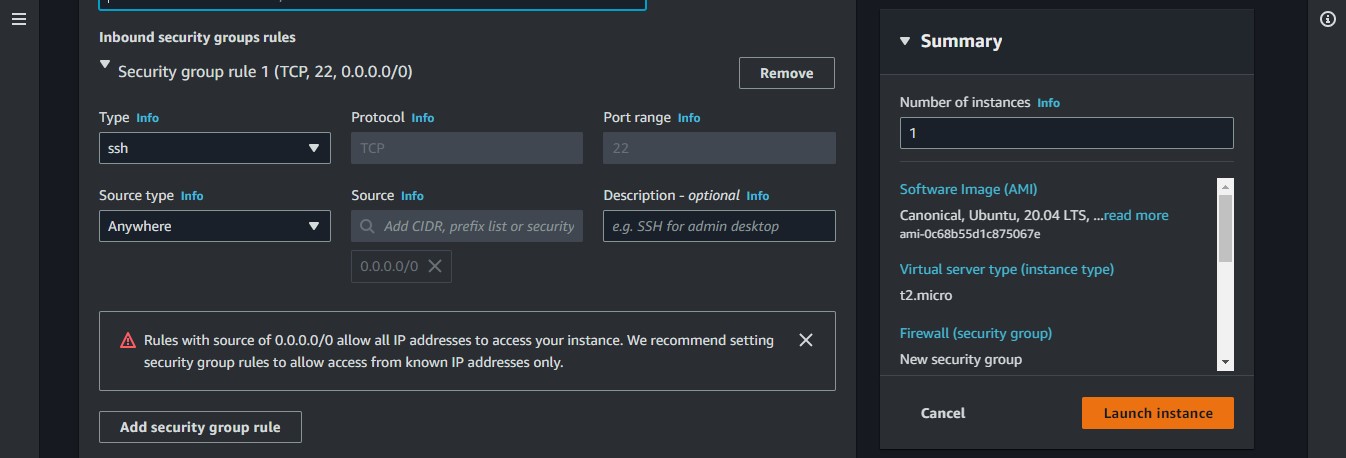
We should get an ssh rule, then we can launch the instance.
The Private Servers
We are going to create 2 private instances the same way we created the bastion server with some exceptions.
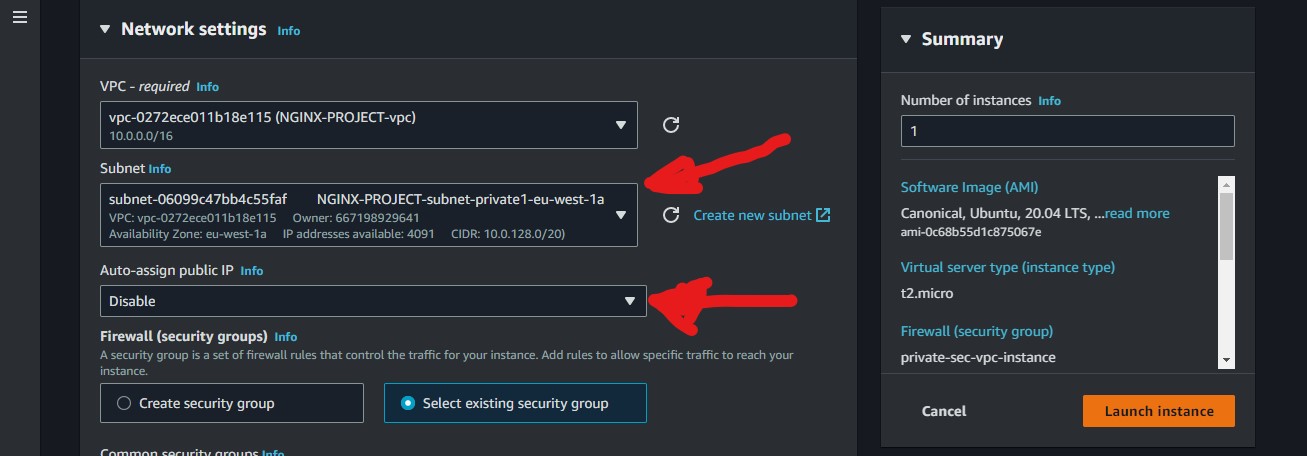
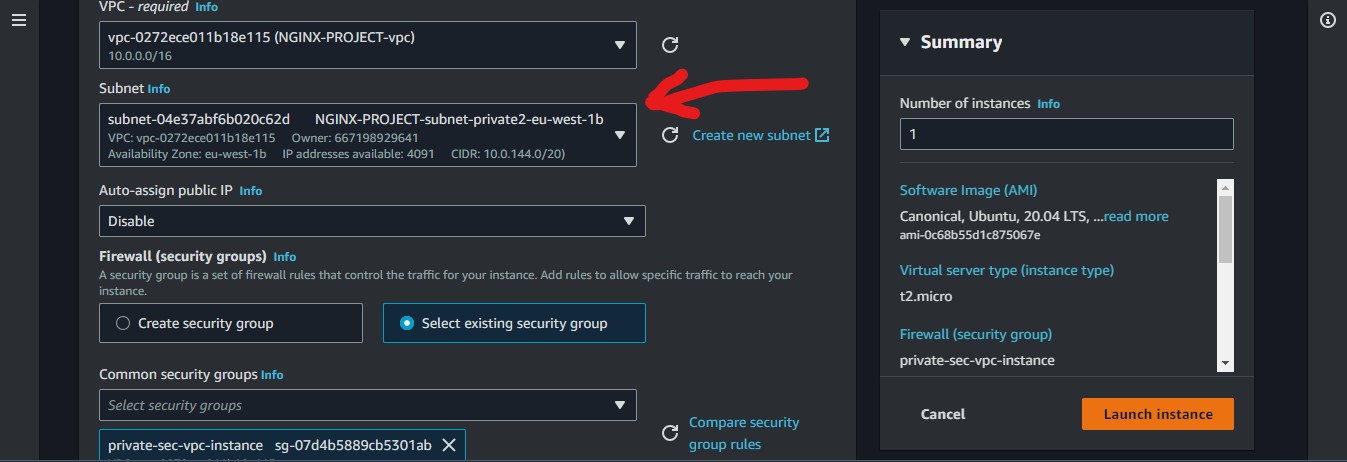
We will attach a different private subnet to each private instance and we won't give them a public IP, as shown above.
Now let us see if our private instances have access to the internet.
Here we will ssh into our bastion server by selecting it and clicking on "connect".

We will then select the ssh client and follow the instruction as shown below
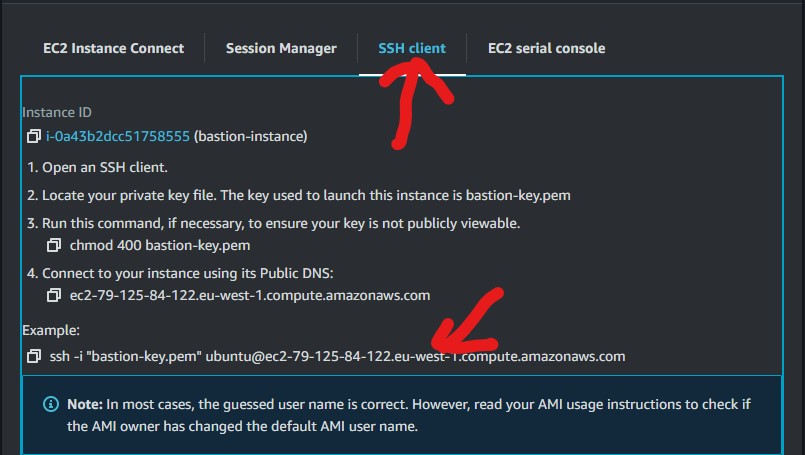
We navigate to where our "bastion-key.pem" file, which we downloaded earlier is stored.
Then we change the file permission as shown below.

We can now ssh into our bastion instance

and repeat the same to ssh into our private servers from the bastion instance.
Note: Since the "bastion-key.pem" file is not available in the bastion instance we will have to create a "bastion-key.pem" file there and copy the contents in the newly created file using any terminal editor of your choice
Once in the private instance, ping google.com to test our internet connectivity

We can see it does not work.
It is time to create our final Instance, which is a nat instance
Setting up our nat instance
So what is a nat instance?
A NAT (Network Address Translation) instance is, like a bastion host, an EC2 instance that lives in your public subnet. A NAT instance, however, allows your private instances outgoing connectivity to the internet while at the same time blocking inbound traffic from the internet.
It is created almost like the instances we have been creating but with some differences.
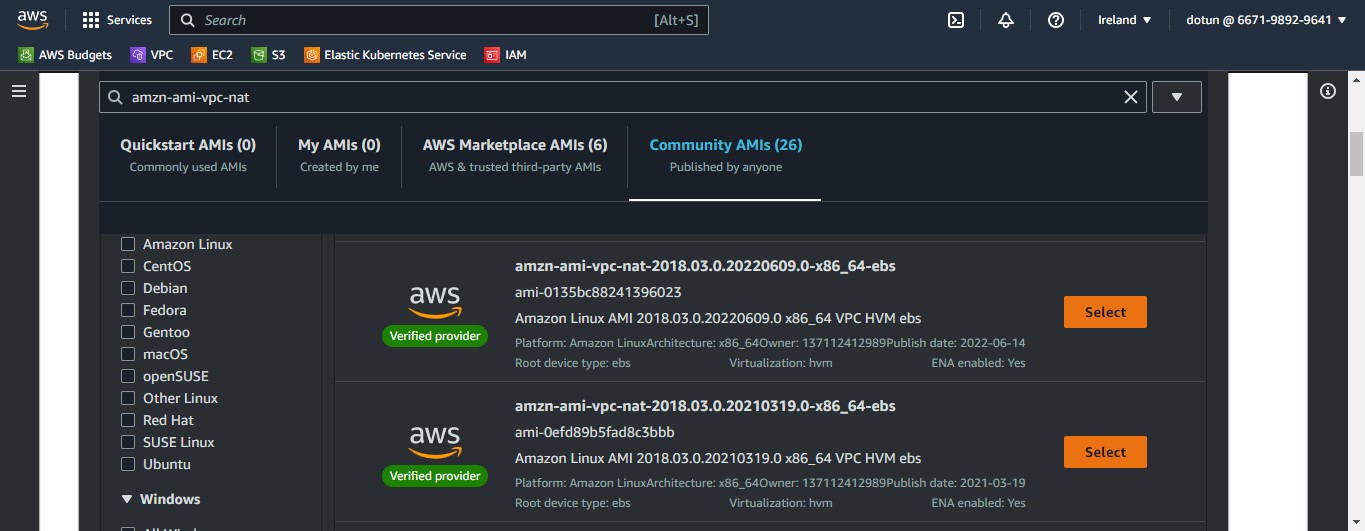
We use the AMI search bar to search for "amzn-ami-vpc-nat"
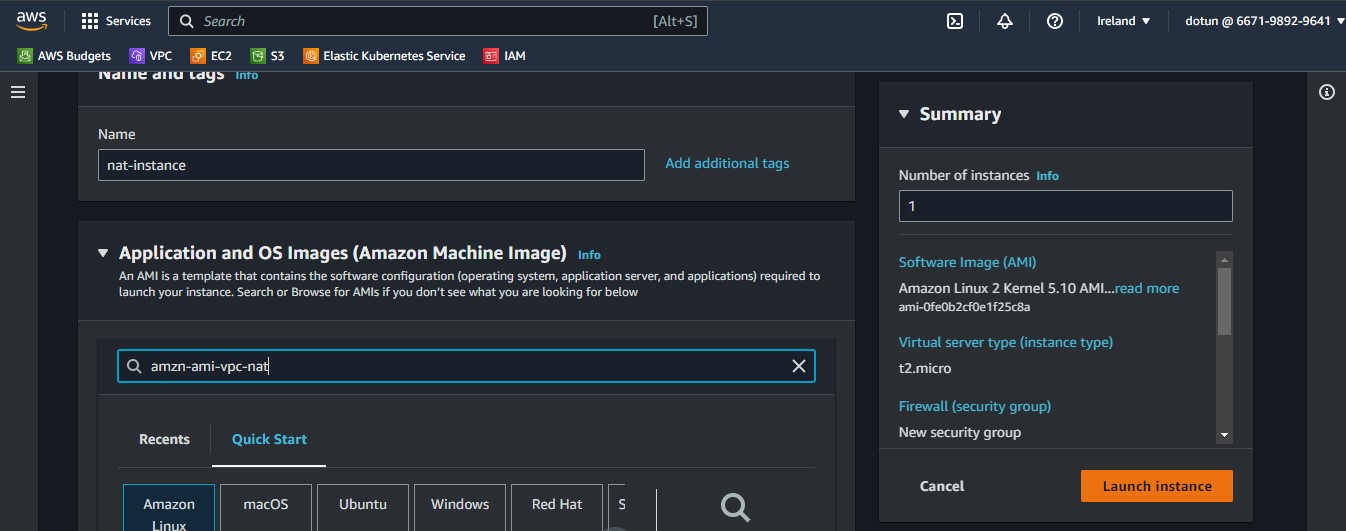
Then we choose one in the Community AMIs
We will also attach the second public subnet to it
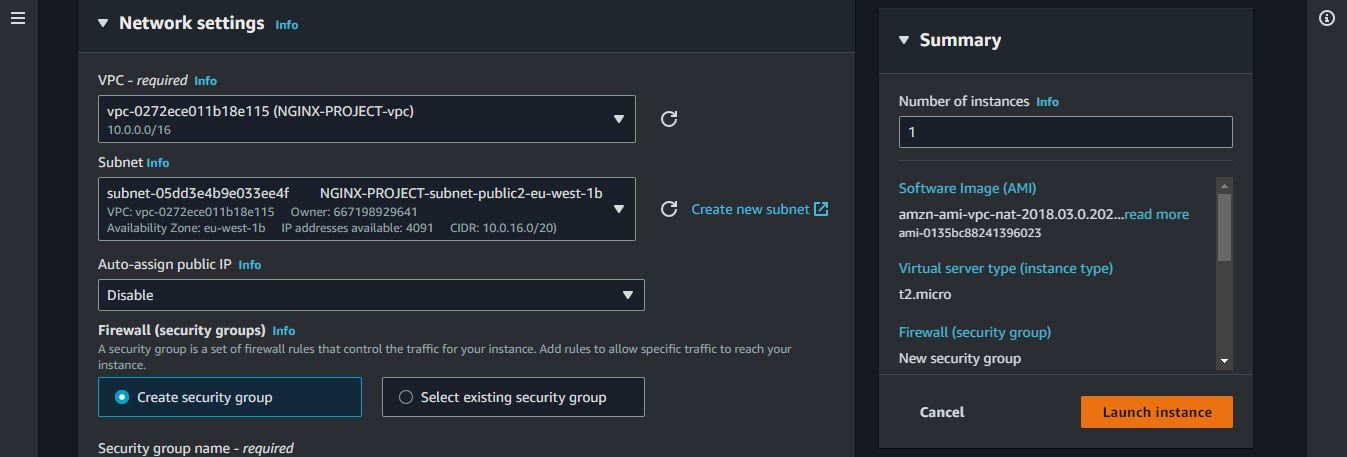
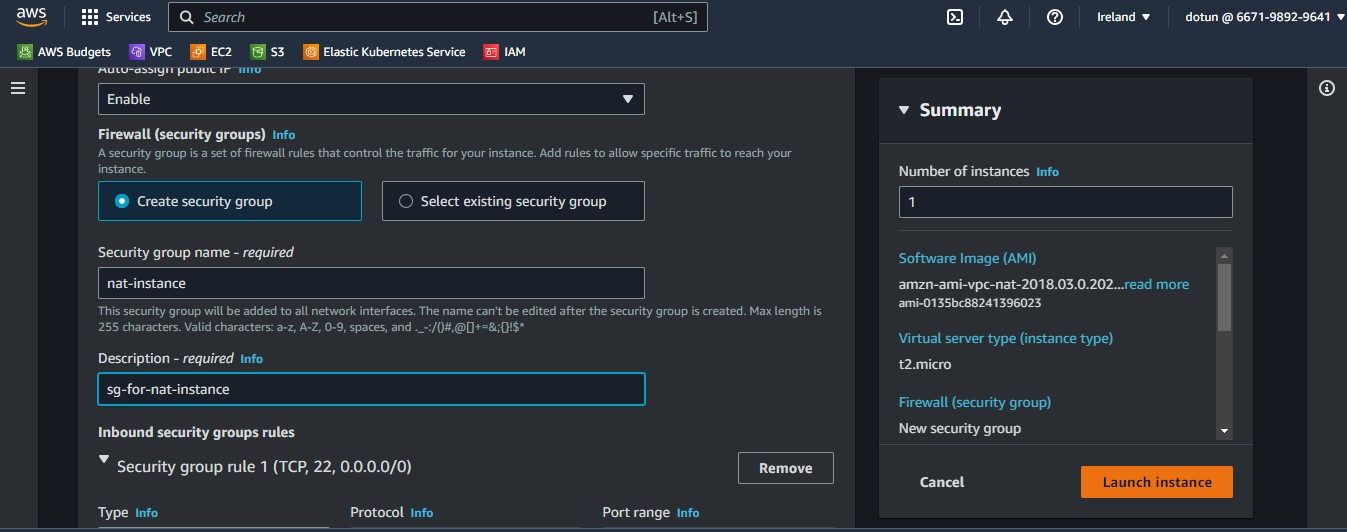
Now we will enable a public IP and create a different security group for it
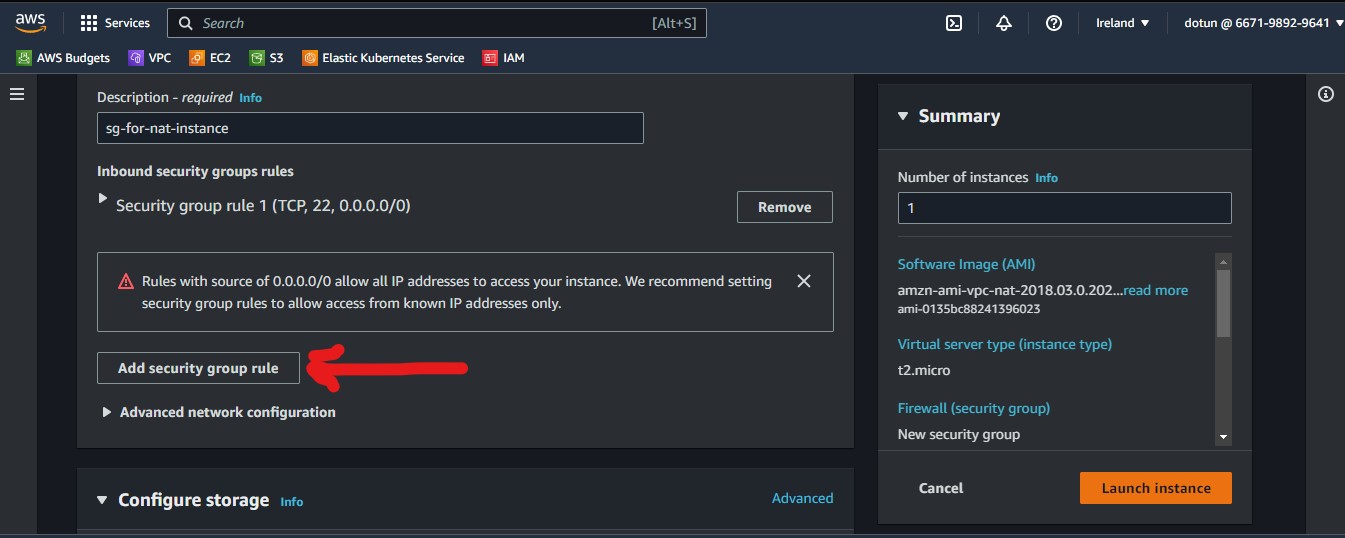
In addition to the default SG rule which is SSH, we will add another with the "ALL ICMP ipv4" type and a custom source type of all denoted by 0.0.0.0/0
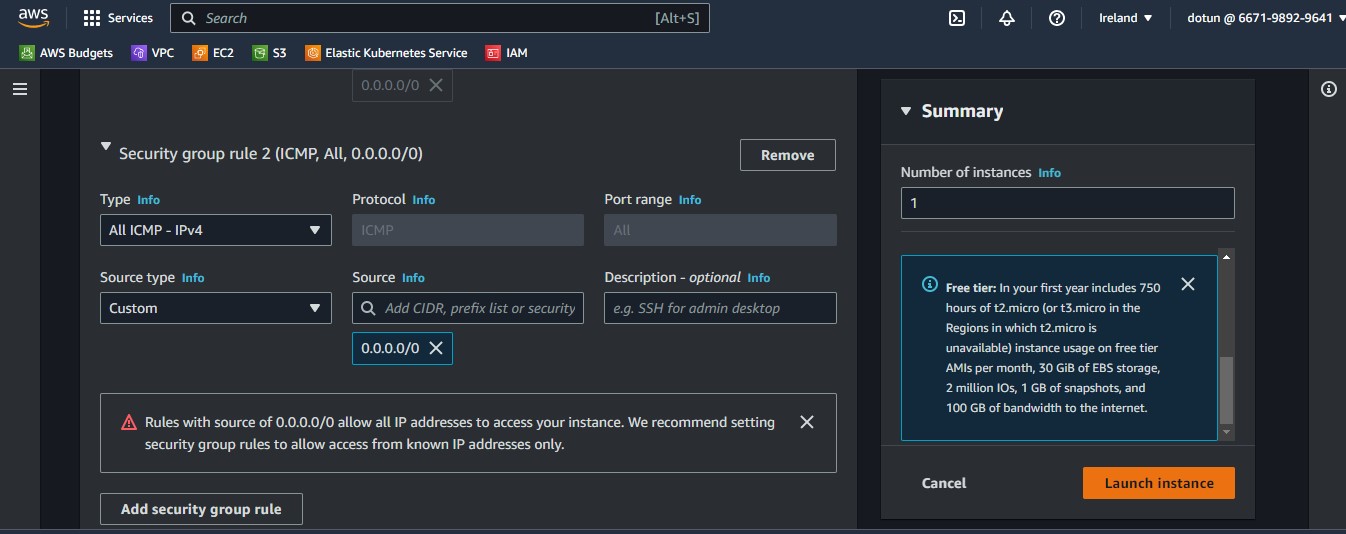
Then we launch our instance
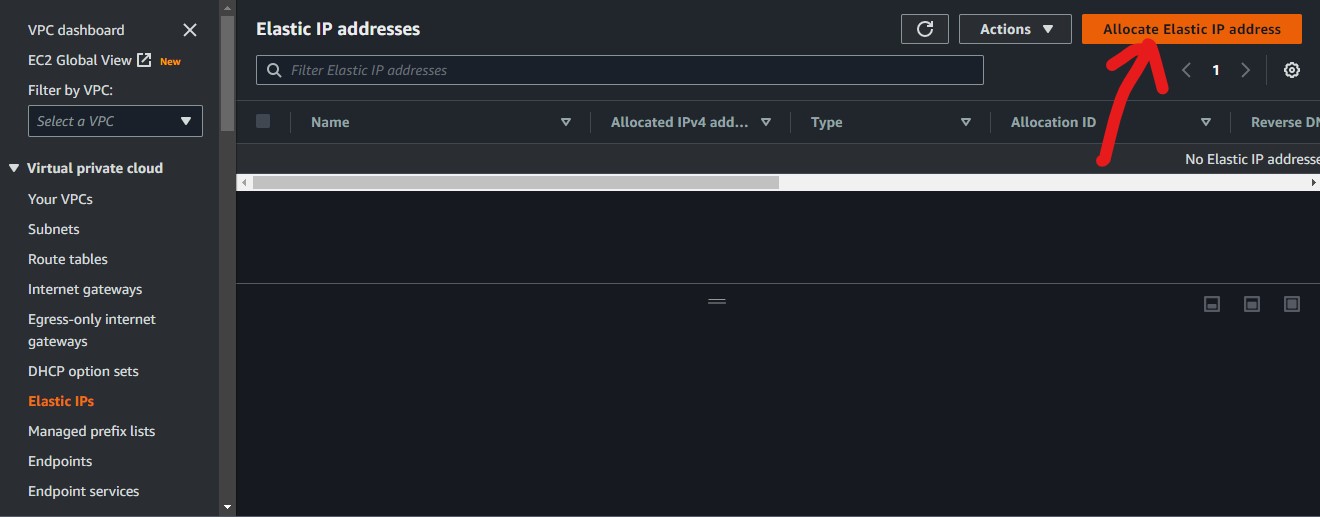
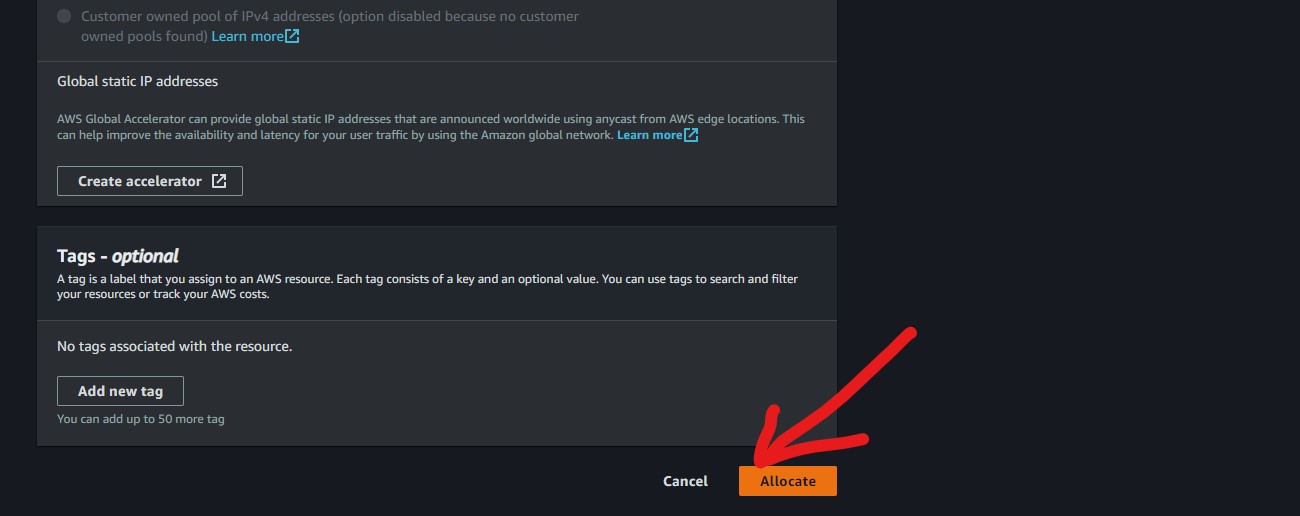
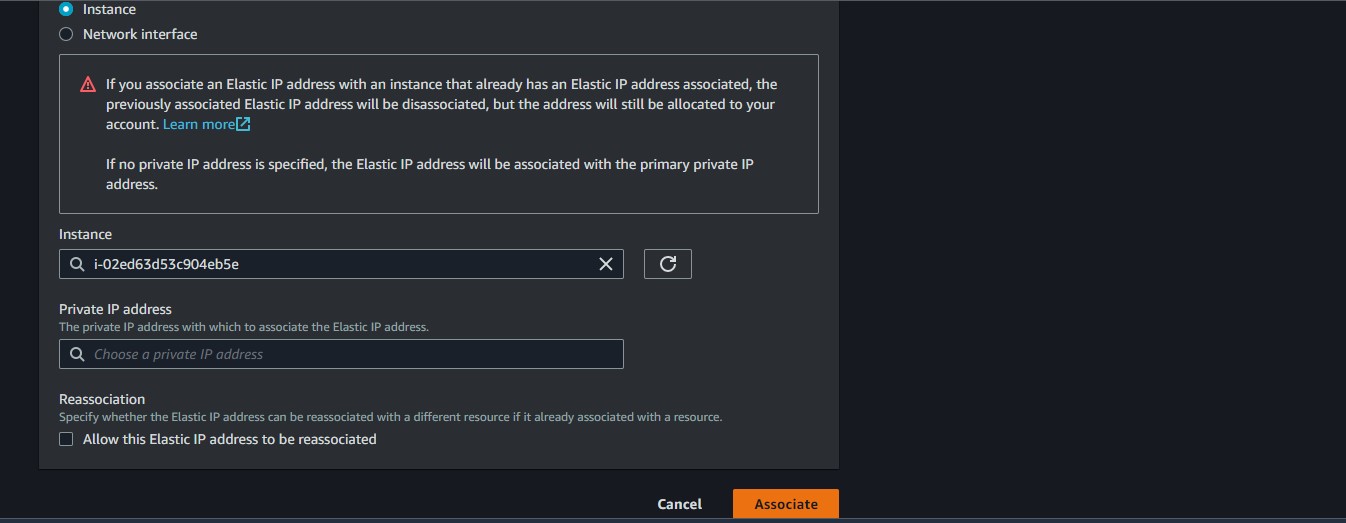
We will allocate an Elastic IP address to it
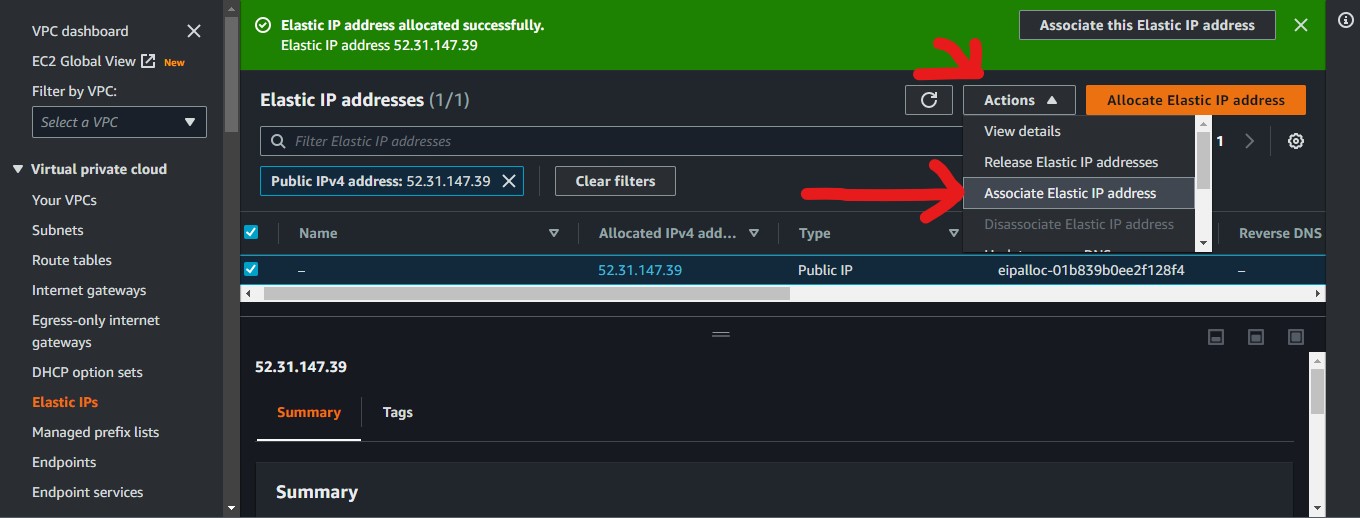
Then we associate the created Elastic IP with our nat instance
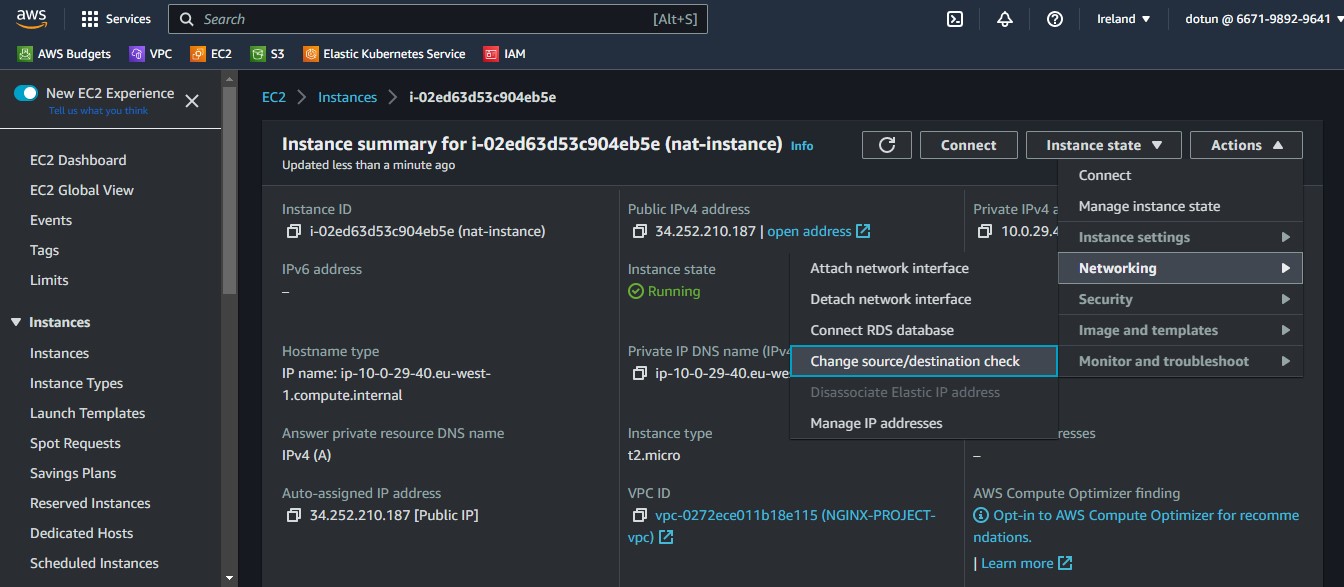
We will also stop "source check", by entering into networking the change source /destination check
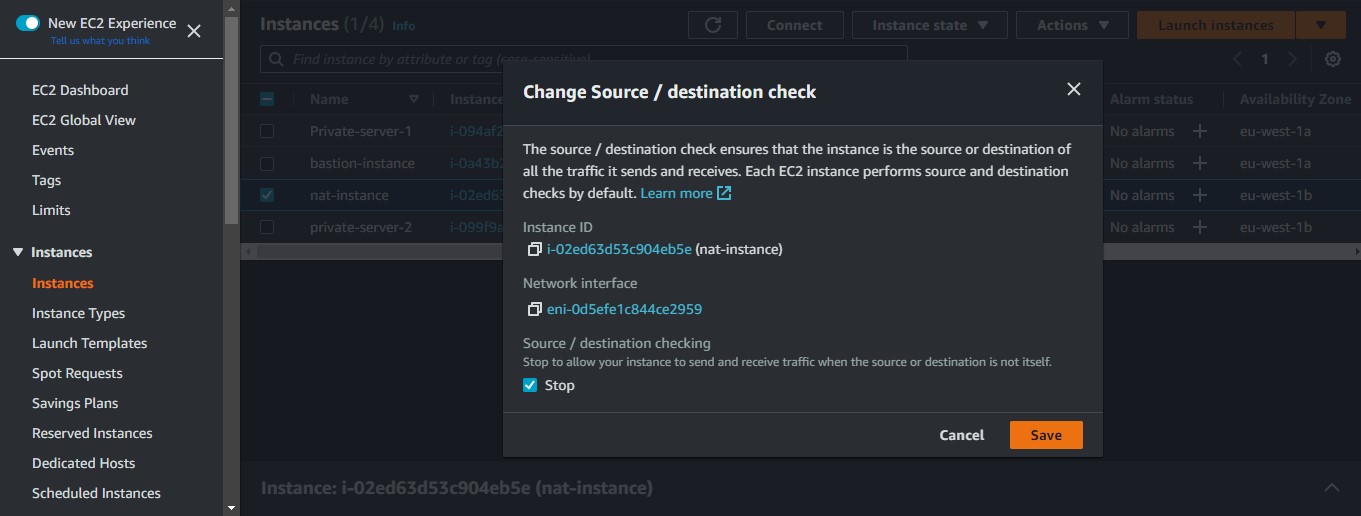
We will select "stop" and click save
Configuring our route tables
The final step is with our route tables
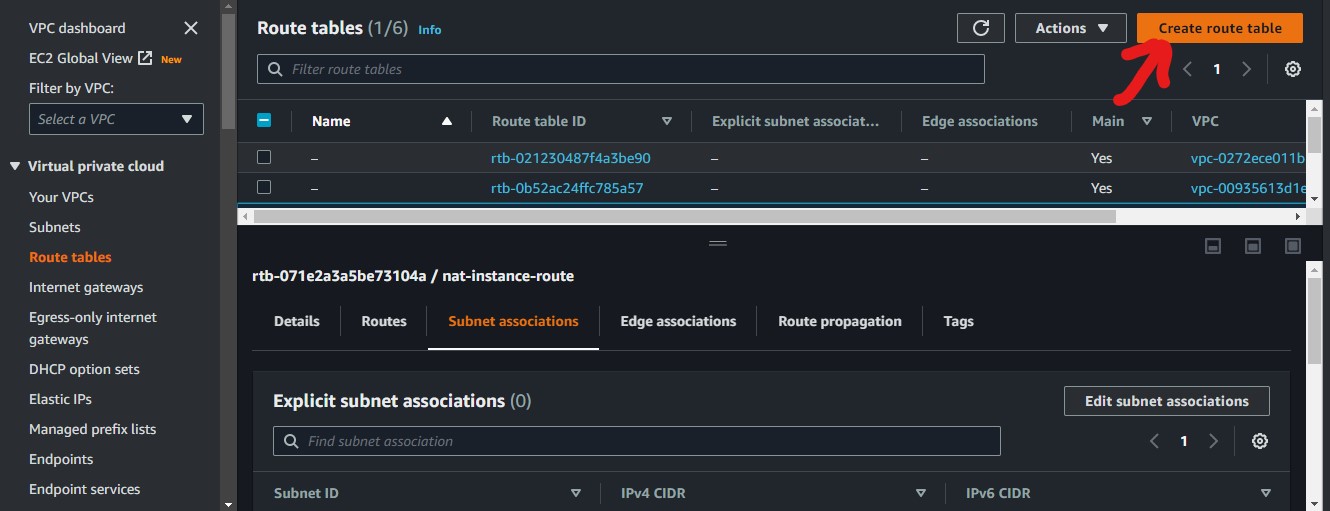
We will navigate to VPC, to create our route table for our nat-instance
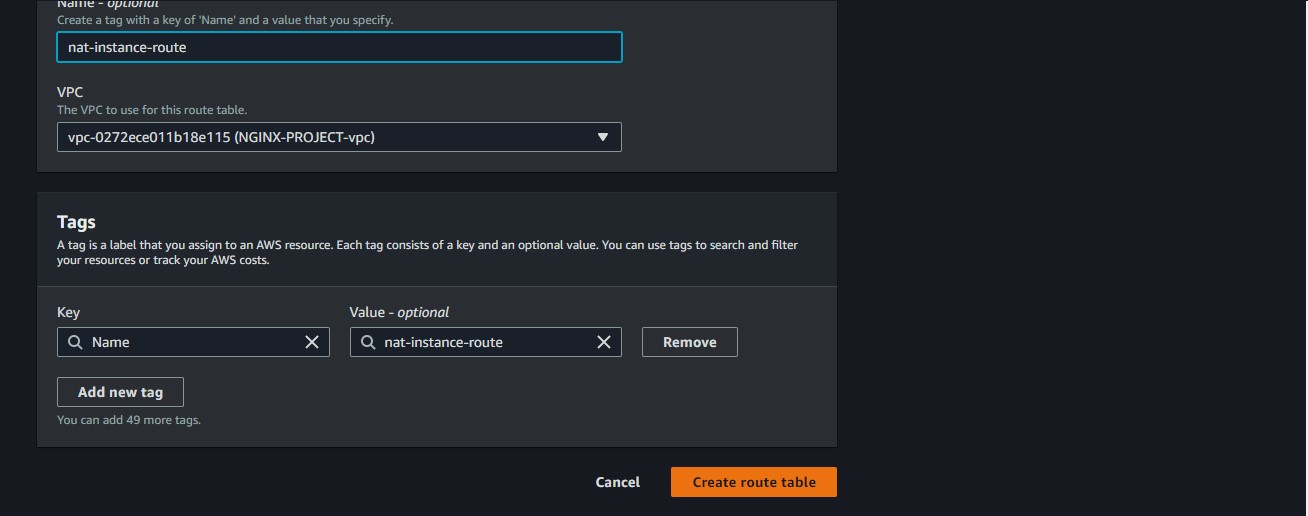
We will give our route table a name and attach our VPC to it
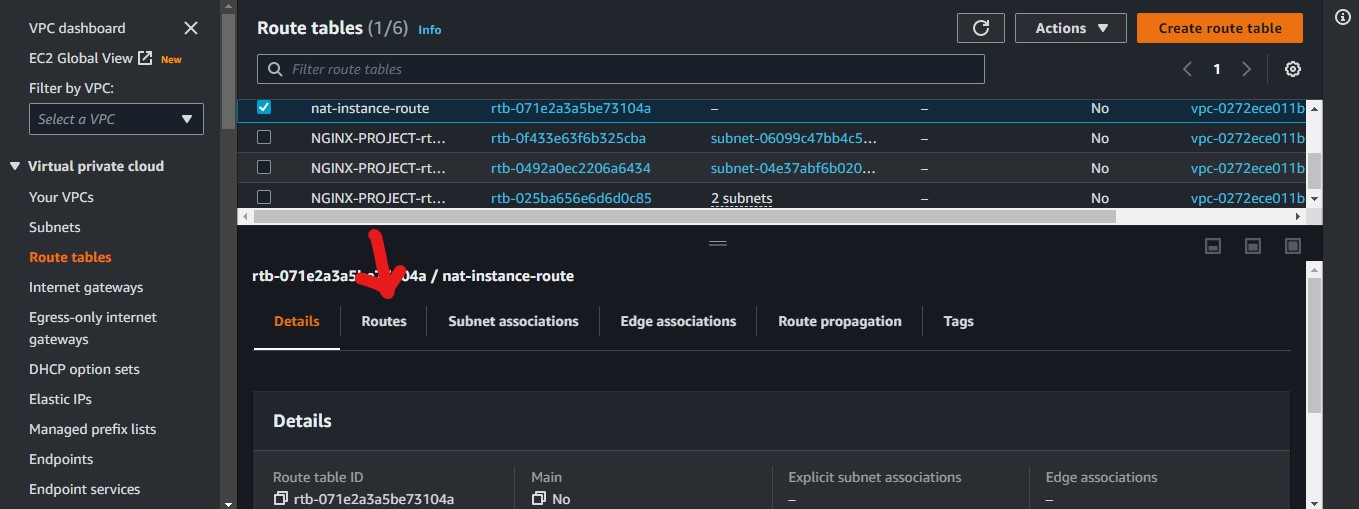
select the newly created route table and click on route and the edit route
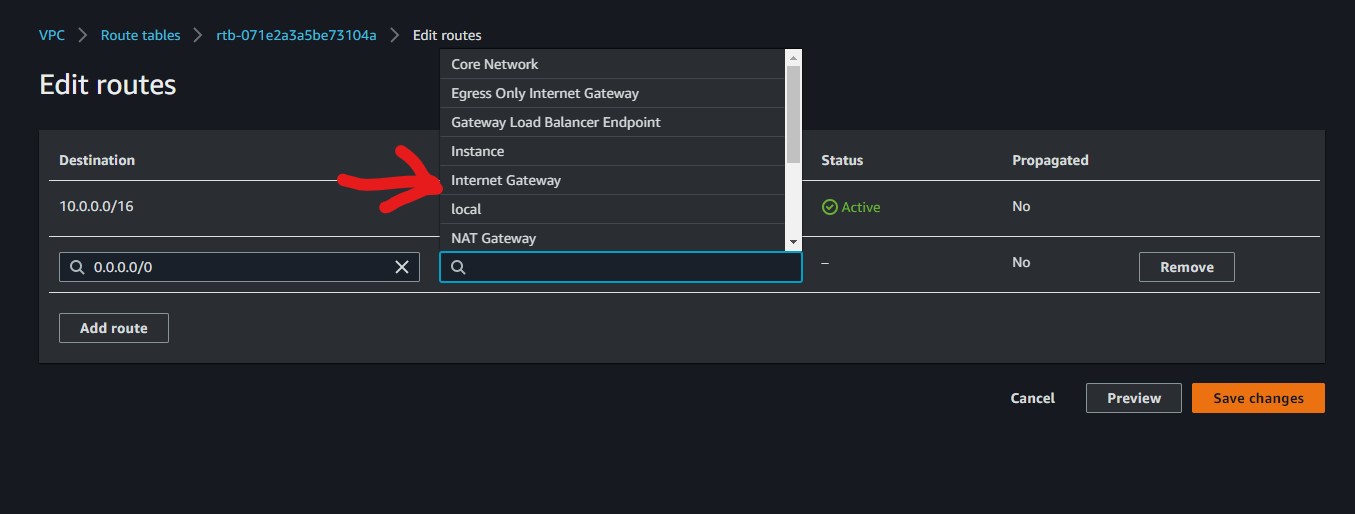
Then Edit the route by adding the 0.0.0.0/0 and selecting instance (nat instance) as our target
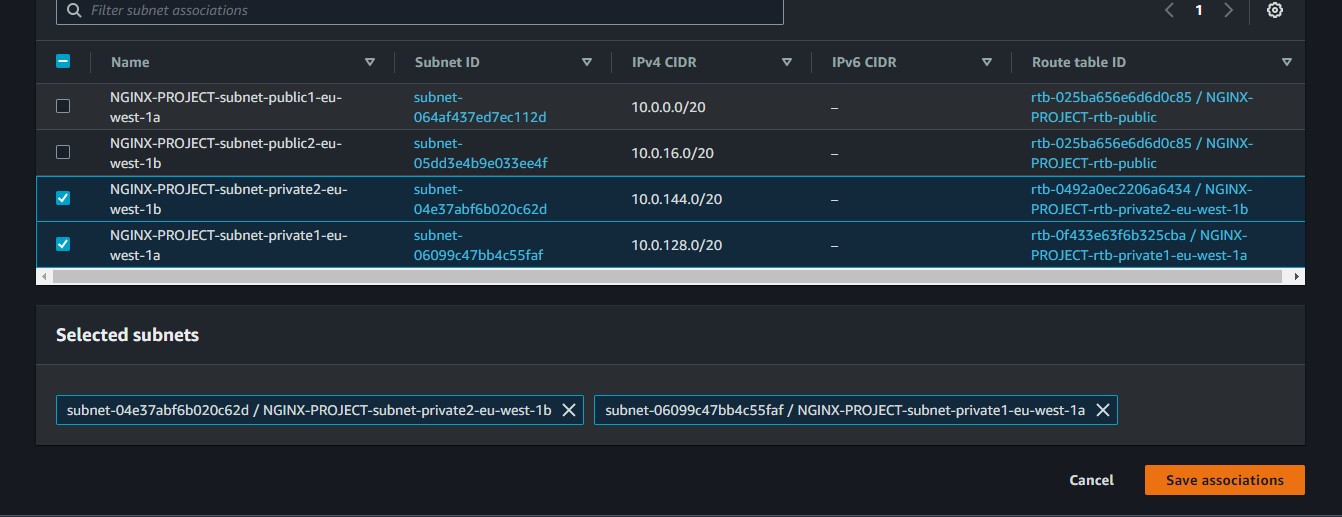
then we select our two private subnets and save associations.

and now our private instances have internet access.
